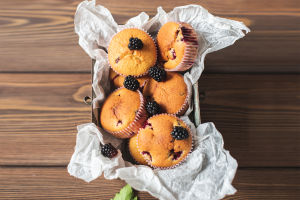
Hey Lykkers! Who doesn't love a good chocolate cookie, right? Especially when it's easy to make, super tasty, and there's no need for all that tiring beating. If you're craving something sweet but don't want the hassle, these chocolate cookies are the answer.
We're talking about a zero-fail recipe that will give you soft, chewy cookies with minimal effort. Let's dive in and bake up a batch of these beauties!
Ingredients You'll Need
To make about 9 perfect chocolate cookies, here's what we need:
• 100g unsalted butter (softened)
• 60g powdered sugar
• 10g cocoa powder
• 160g low-gluten flour (also known as cake flour)
• 20g cornstarch
• 4g baking powder
• 1g salt
• 40g whole egg liquid (basically a beaten egg)
• A generous amount of high-temperature resistant chocolate chips (or any chocolate chips you like)
These components will provide us with a delectable dough, combining the crunchiness of the exterior with the tenderness of the interior.
Step-by-Step Instructions
Step 1: Softening the Butter
Start by softening the unsalted butter. If the dough is still too firm, let it sit at room temperature for a while. Once it's ready, add the powdered sugar to it.
Step 2: Creaming the Butter and Sugar
Now, use a hand mixer to beat the butter and sugar together until the mixture is light and fluffy. This is where the magic happens! It should look pale and airy—this means you're on the right track.
Step 3: Sifting the Dry Ingredients
Next, we'll sift the dry ingredients. Add the low-gluten flour, cocoa powder, cornstarch, baking powder, and salt into a sifter and sift it directly into the butter-sugar mixture. This helps ensure everything is mixed evenly and prevents any lumps in your dough.
Step 4: Adding the Egg
Pour in the whole egg liquid. You can do this by cracking an egg, beating it, and then adding about 40g of it to the mixture. Mix it all together until a dough starts to form. You want the dough to come together but not be too sticky.
Step 5: Forming the Dough
Once everything is well mixed, you should have a nice, smooth dough. It's time to roll it into small balls. Divide the dough into 9 equal portions, roll them into balls, and then gently flatten them with your hands.
Step 6: Adding the Chocolate Chips
Take your high-temperature resistant chocolate chips (these are important because they hold up well in the heat of the oven) and press a few onto the surface of each cookie. Press them down slightly so they're embedded in the dough.
Step 7: Baking the Cookies
Preheat your oven to 170°C (around 340°F). Once the oven is ready, place the cookies on a baking tray lined with parchment paper. Bake them for about 15 minutes. Keep an eye on them so they don't overbake—they should be lightly golden on the edges.
Step 8: Cooling and Enjoying
When they come out of the oven, let them cool for a few minutes. As they cool, they'll firm up a bit, and the chocolate chips will be perfectly melted inside. Now, they're ready to be enjoyed!
Tips and Tricks for the Perfect Chocolate Cookies
• Butter Softness: Make sure the butter is softened properly—it should be soft to the touch but not melted. This will help the sugar incorporate more easily, leading to a fluffier cookie.
• No Overmixing: When adding the dry ingredients to the wet ingredients, mix just until combined. Overmixing can result in tough cookies.
• High-Quality Chocolate Chips: Use high-temperature resistant chocolate chips. These hold up better in the oven and will melt just right inside the cookie, making each bite deliciously gooey.
• Cookie Size: If you want bigger cookies, you can increase the size of the dough balls, but remember, this will slightly affect the baking time. Keep an eye on them to avoid overbaking.
And that's it, Lykkers! These cookies are super easy to make, and with zero beating required, you'll be enjoying homemade chocolate cookies in no time. Whether you're baking for a party, family gathering, or just a cozy afternoon treat, these cookies are sure to be a hit. Let me know how yours turn out, and if you added any fun twists to the recipe! Happy baking!


